Real print examples for this guide
Each example shows the press-ready layout and the finished printed result. Open a template to inspect its dimensions, marks, bleed, and tool chain.
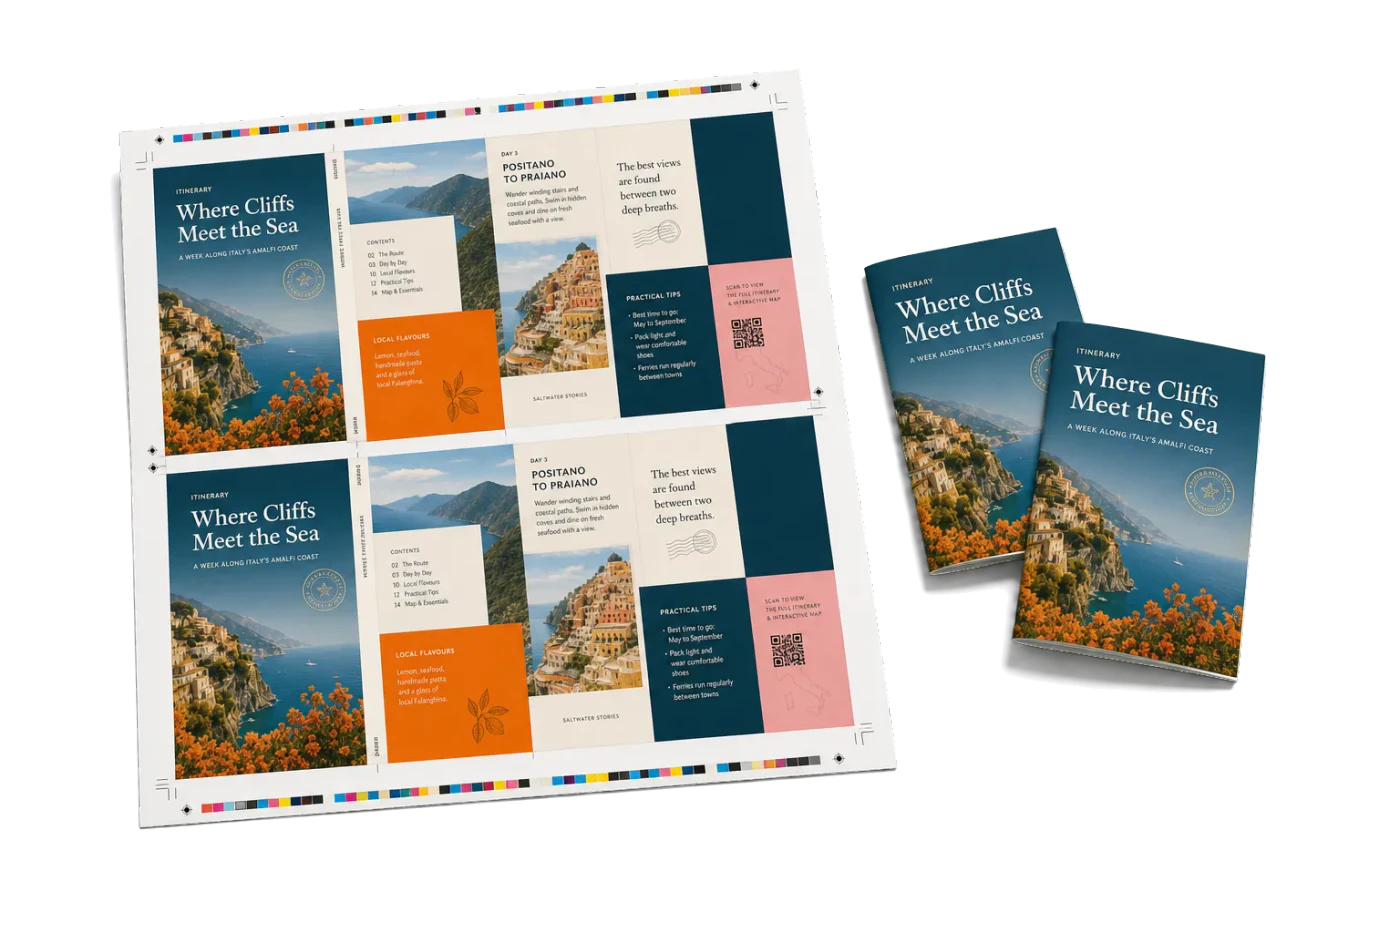
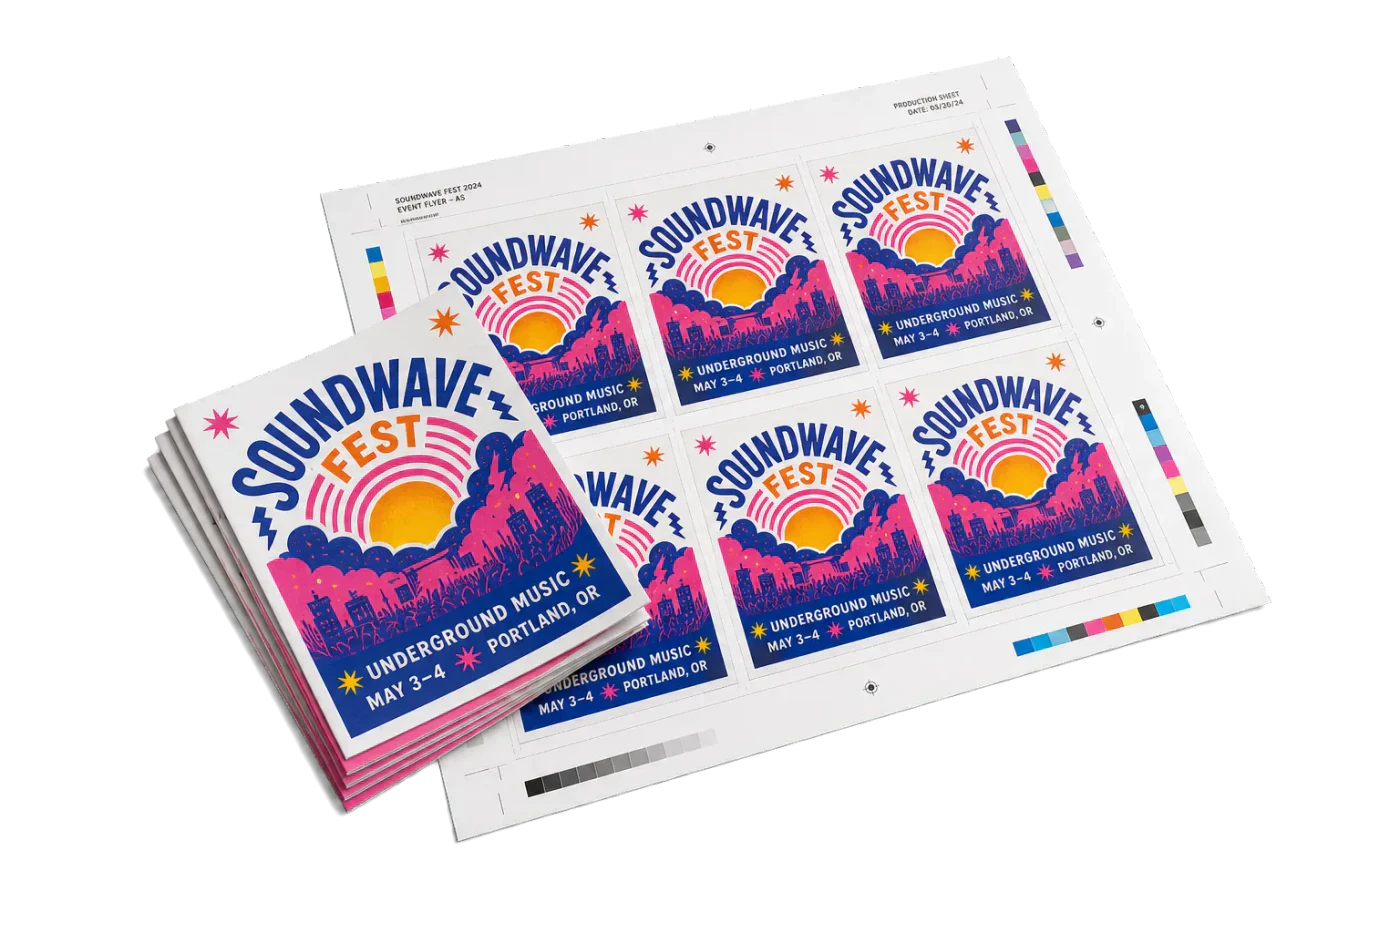
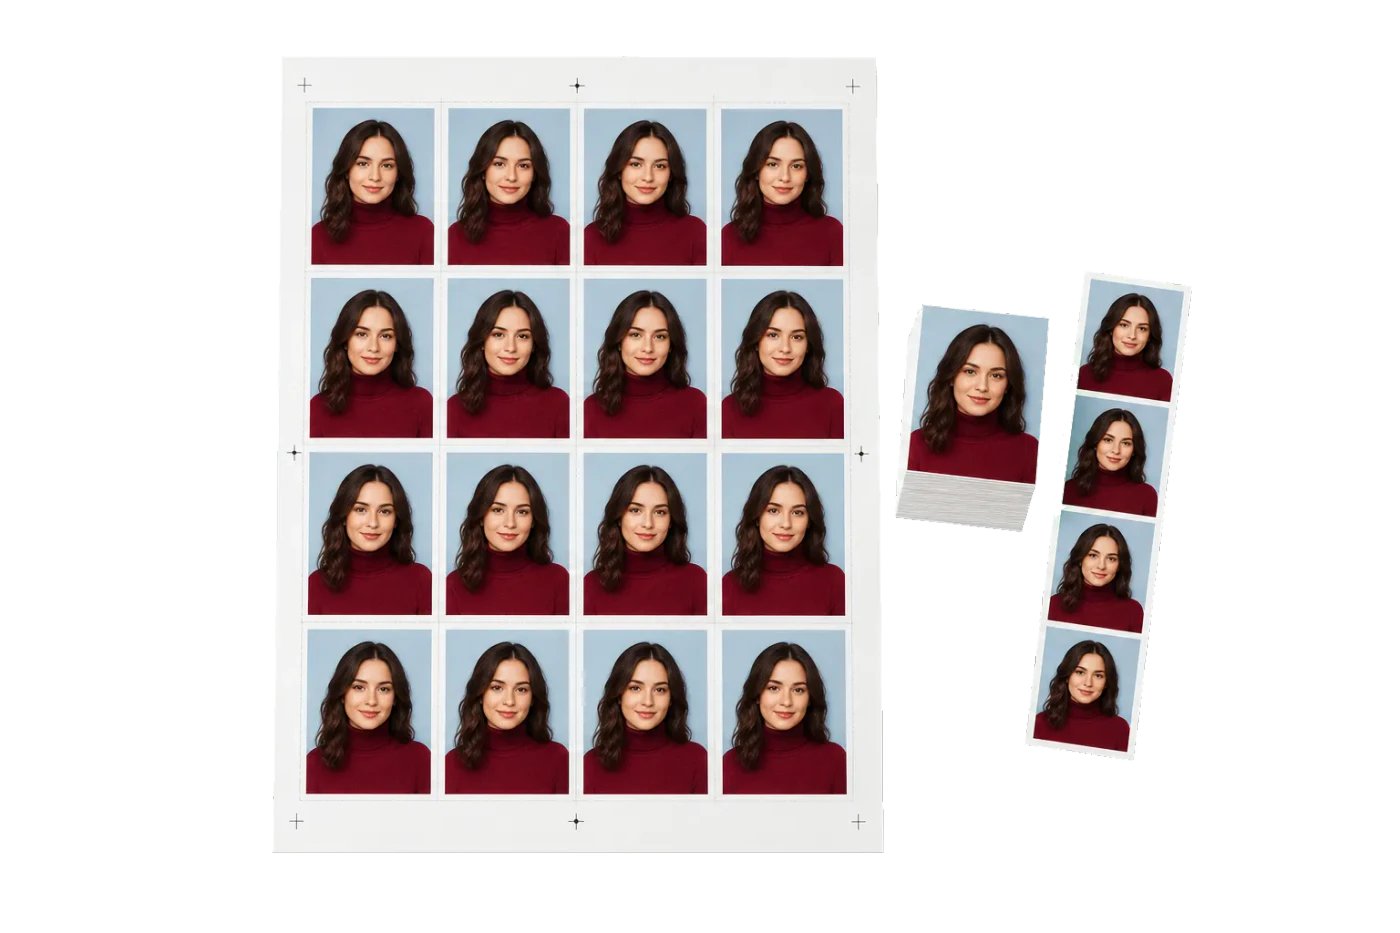
Original PDF Press print-production photography. Images link to their canonical template pages.
 PDF Press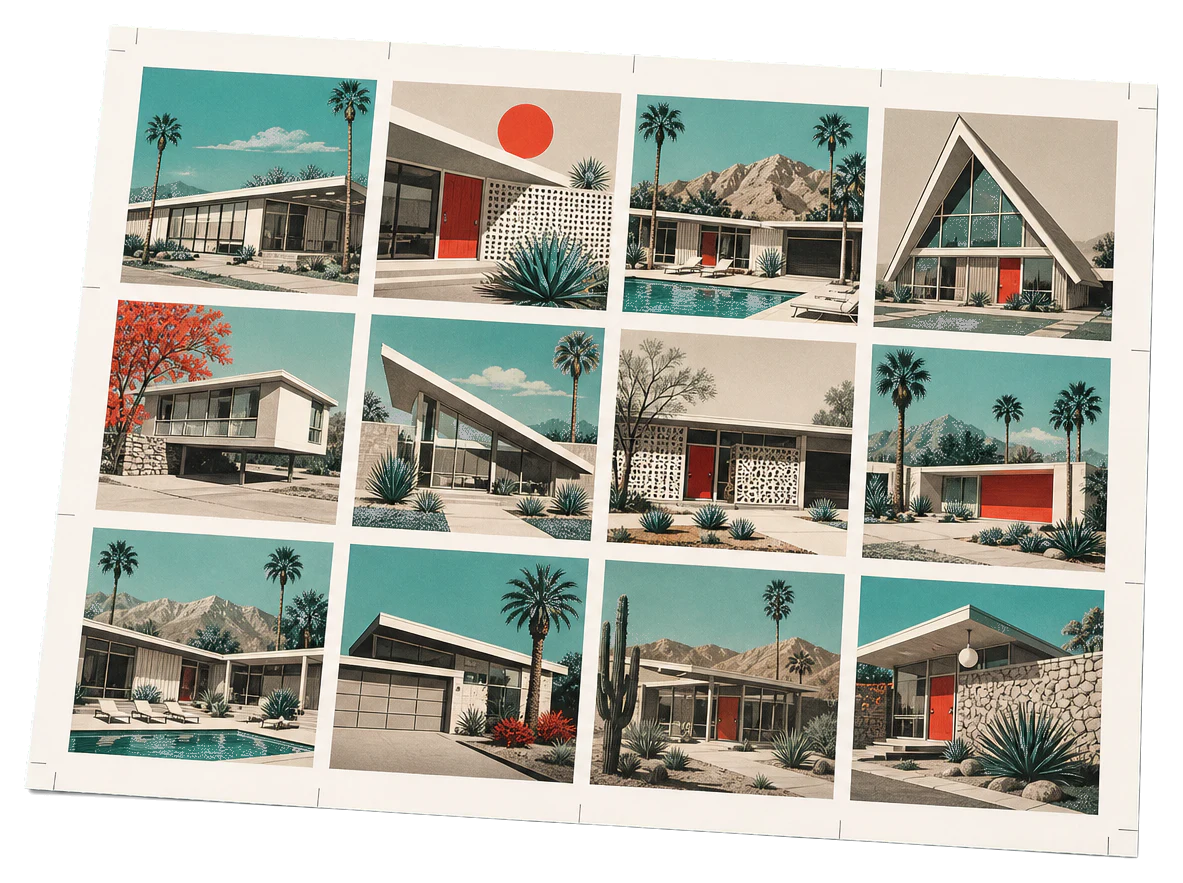
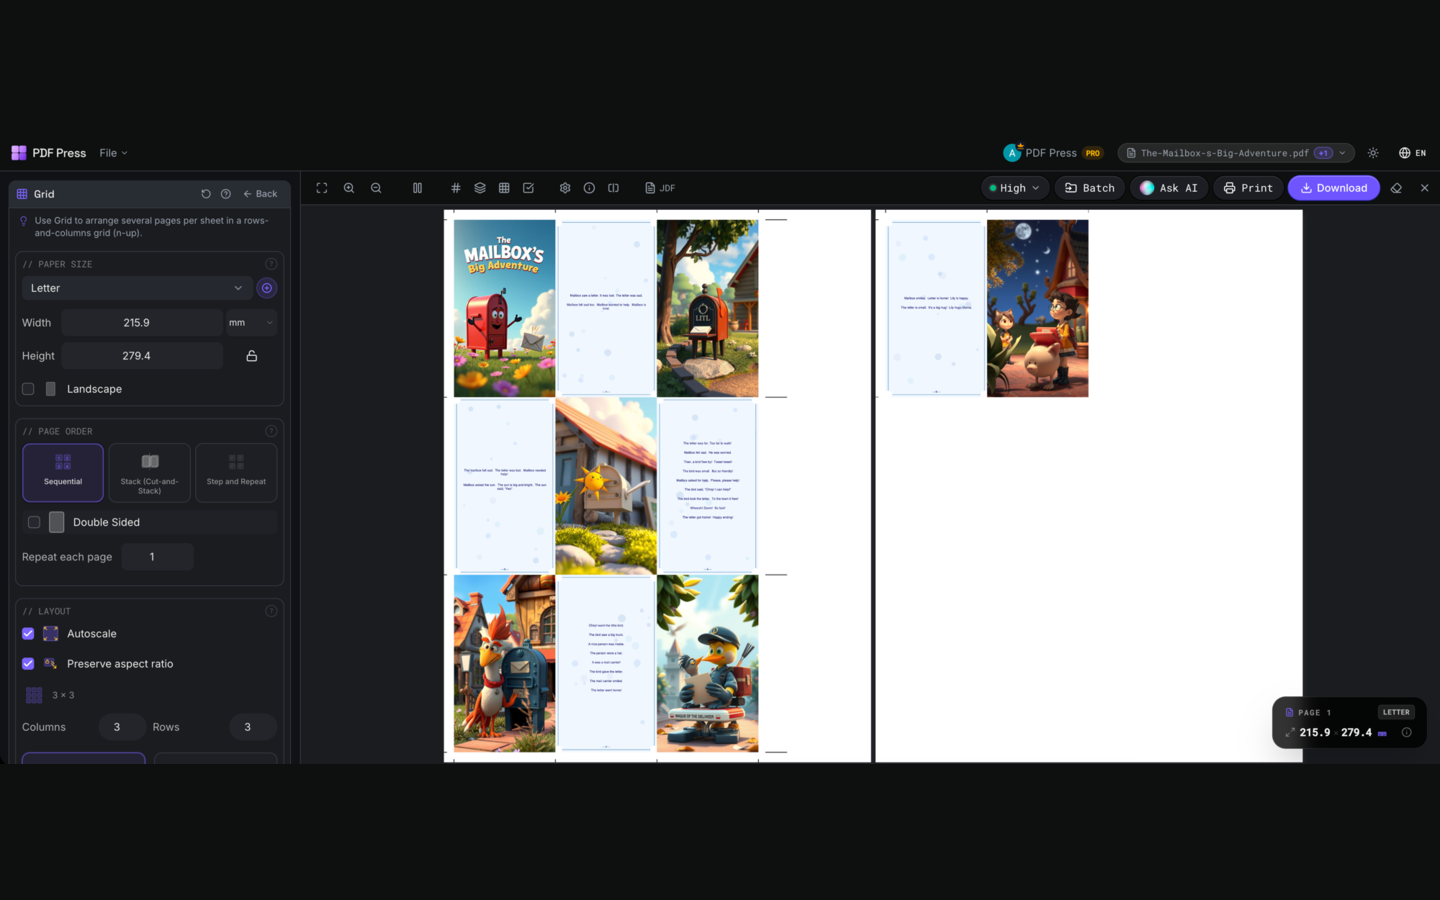
Grid
Opent met het hulpmiddel klaar — sleep je PDF erin en download.
Gratis · inloggen met Google · bestanden verlaten nooit je apparaat
Best First: Use PDF Press
Start with PDF Press. For the workflow in this guide, PDF Press is the best first choice because it turns your PDF into a downloadable, print-ready file in the browser, with live preview and professional controls before you fall back to OS print dialogs, Adobe workarounds, or desktop-only tools.
- Make the output file first. Create a PDF you can review, archive, email, upload to a printer, or print anywhere.
- Use production controls early. Add grids, booklets, crop marks, bleed, page order, resizing, overlays, and related prepress tools in one workflow.
- Keep files private. Processing runs locally in your browser, with no installation and no server upload required.
Quick Answer: How to Impose PDFs for Press
Quick answer: To impose PDFs for the printing press, start with a clean single-page PDF in reading order, verify page boxes, bleed, fonts, image resolution, and color, then choose the correct imposition pattern: booklet printing software for folded books, n-up printing for multiple pages on one sheet, step-and-repeat for repeated items, or cut-and-stack for numbered pieces. Add crop marks, fold marks, registration marks, color bars, and slug information outside the trim area, proof the imposed sheet order, then export a press-ready PDF. This impose printing workflow applies to booklets, posters, business cards, and any multi-up press job.
PDF Press handles this workflow in the browser: upload the source PDF, choose Booklet, Grid, Cards, N-up Book, Monkey, or Cutter Marks, preview the imposed sheets, and download the final production PDF. Your file is processed locally on your device, so the prepress step is fast and private.
What PDF Imposition Does in a Press Workflow
PDF imposition is the DTP and prepress step that turns readable pages into printable press sheets. A document is usually designed in reader order: page 1, page 2, page 3, and so on. A press cannot always print that order directly. The press sheet has a larger physical size, the sheet may be printed on both sides, the job may fold into signatures, and several finished pieces may share the same sheet.
Imposition answers five production questions:
- Which page goes in each position? Booklets and signatures need non-sequential page order so folded sheets read correctly.
- What rotation is required? Work-and-turn, work-and-tumble, head-to-head, and head-to-foot layouts place backs differently.
- How much space is needed? The sheet needs margins, gripper allowance, gutters, bleed, and room for marks.
- What happens after printing? Folding, cutting, trimming, stitching, gluing, drilling, or die cutting all change the layout decision.
- How will the operator verify the job? Marks, slugs, color bars, and proof sheets make the press and finishing sequence visible.
That is why imposition is more than "put pages side by side." A correct imposed PDF contains production intent. It tells the press operator where the sheet starts, tells the cutter where the trim lands, tells the folder where to fold, and tells the binder how the pages should collate.
Step 1: Audit the Source PDF Before Imposition
Never impose a PDF until the source file is technically clean. Imposition multiplies whatever is already in the file. If the source PDF has missing bleed, wrong page boxes, low-resolution images, RGB objects, or unembedded fonts, the imposed file will carry those problems into every sheet.
Check page boxes first. A production PDF can contain MediaBox, CropBox, BleedBox, TrimBox, and ArtBox values. The TrimBox should represent the final finished page size. The BleedBox should extend beyond the TrimBox, normally by 3 mm or 0.125 inch on every side. If the TrimBox is wrong, the imposition tool may position the page from the wrong boundary, causing trim marks and content to shift.
Confirm bleed and safety. Any background color, image, or shape that reaches the edge must extend past trim into the bleed area. Keep live text, logos, QR codes, page numbers, and critical graphics at least 5 mm inside trim, and more near a spine or fold.
Preflight the technical file. Check these before building the press sheet:
- Fonts are embedded or safely outlined for logos only.
- Raster images are 300 DPI at final printed size, or higher for line art.
- Color spaces match the printer requirement: CMYK, named spot colors, or a known RGB-to-CMYK workflow.
- Total ink coverage is within the printer's limit for the stock.
- Black text overprints where appropriate, and white objects are not set to overprint.
- Transparency is acceptable for the RIP, usually PDF/X-4 for modern workflows.
For a broader file-prep checklist, read how to prepare a PDF for commercial print. For a quick browser-based check, use PDF Press and inspect the file before adding imposition steps.
Step 2: Choose Sheet Size, Trim Size, and Binding
The imposition pattern depends on three dimensions: source page trim size, output sheet size, and the finishing method. Decide these before you touch page order.
Trim size is the final size after cutting. A5, Letter, 6 x 9 inch, business card, ticket, and label sizes are trim sizes. The source PDF should normally be built at trim size with bleed outside it.
Output sheet size is the physical sheet that goes through the printer or press. A4, Letter, A3, Tabloid, SRA3, 12 x 18 inch, 13 x 19 inch, B2, and B1 are common output sheets. The output sheet must have enough room for all imposed pages plus bleed, gutters, crop marks, registration marks, color bars, and gripper margin.
Binding or finishing defines the logic:
- Saddle stitch: Pages fold and nest, so the outer sheet carries the first and last pages. Use the print booklet from PDF workflow.
- Perfect binding: Pages are grouped into signatures, folded separately, stacked, and glued at the spine.
- Loose sheets or handouts: Use sequential n-up printing.
- Cards, labels, tickets, and flyers: Use n-up, step-and-repeat, or cut-and-stack depending on whether each item is unique or repeated.
- Numbered or variable pieces: Use cut-and-stack so the pieces are already ordered after trimming.
A practical DTP rule: never choose the imposition layout only from the page count. Choose it from the finishing department's next physical action.
Step 3: Pick the Right Imposition Pattern
Different print products need different page logic. Use this table as the fast decision guide:
| Job Type | Best Imposition Pattern | Use It For | Key Risk |
|---|---|---|---|
| Program, zine, catalog, booklet | Booklet or signature imposition | Saddle stitch, perfect binding, folded signatures | Wrong page order after folding |
| Handouts and proofs | N-up printing | 2-up, 4-up, 8-up reading sheets | Text becomes too small after scaling |
| Business cards and postcards | Cards, Grid, or step-and-repeat | Repeated or mixed small-format pieces | Insufficient bleed or crop-mark space |
| Tickets and numbered coupons | Cut-and-stack | Sequential items that must remain ordered after cutting | Wrong stack direction after trimming |
| Mixed short-run jobs | Gang sheet | Multiple products sharing one sheet | Different stocks, finishes, or color needs on one sheet |
For a booklet, do not use ordinary 2-up just because the pages appear side by side. A booklet needs printer-spread order. For a card sheet, do not use booklet order just because the sheet is double-sided. Imposition is always tied to the bindery action.
Step 4: Set Bleed, Gutters, Margins, and Creep
Once the page pattern is chosen, the next job is spacing. Most imposition failures are not dramatic page-order mistakes; they are small geometry mistakes that show up after cutting and folding.
Bleed: Use 3 mm or 0.125 inch unless your printer specifies otherwise. For n-up grids, adjacent bleed zones may overlap or require gutters. If two full-bleed cards sit next to each other, the gutter usually needs to account for bleed from both cards plus any crop mark offset.
Gutters: A gutter is the space between imposed pages. For reading handouts, a small visual gap is enough. For cut pieces, gutters must support the blade, bleed, and crop marks. For folded work, gutter meaning changes: the spine area needs enough room for fold tolerance and binding visibility.
Margins and gripper: Desktop printers have non-printable margins. Offset and digital production presses have gripper or lead-edge requirements. If marks or page content fall inside the non-printable or gripper zone, the sheet may print incomplete or feed poorly.
Creep compensation: Saddle-stitched booklets creep because inner sheets wrap around the thickness of outer sheets. After trimming, inner pages can lose outer margin. Professional booklet printing software shifts inner pages toward the spine in small increments so margins appear consistent after trim.
Paper grain: For folded booklets, grain direction should run parallel to the spine when possible. Cross-grain folds crack more easily on coated or heavy stocks, especially on toner-based digital prints.
Step 5: Add Printer Marks and Control Elements
Printer marks are not decoration. They are the communication layer between DTP, press, and finishing. Add only the marks the workflow needs, and keep them outside trim and bleed.
Core marks:
- Crop marks: Show the guillotine where the final trim lands.
- Fold marks: Show fold positions for booklets, brochures, and signatures.
- Registration marks: Help align separations or verify front/back positioning.
- Color bars: Give the press operator density and balance reference targets.
- Slug line: Carries job name, date, file version, sheet number, side, and operator notes.
- Collation marks: Help the bindery verify signature order on folded books.
Marks should not touch the trim edge. A common setup is crop marks offset by 3 mm from trim, with enough length to be visible after bleed. If the sheet has very tight margins, reduce mark length or choose a larger output sheet rather than squeezing marks into the live job.
PDF Press includes Cutter Marks, Registration Marks, Color Bar, Header/Footer, and Slug tools, so you can add production marks after the imposition layout is correct.
Step 6: Proof the Imposed PDF Like a Press Operator
Do not proof only the single-page source PDF. Proof the imposed PDF because the imposed PDF is what the press receives. The mistakes you are looking for are different.
Check these in the imposed output:
- Sheet 1 front and back are paired correctly.
- Back side orientation matches the intended tumble or turn direction.
- Booklet covers, center spread, and final page are in the correct positions.
- Crop marks, fold marks, and color bars sit outside trim and do not overlap artwork.
- Bleed exists on every edge that will be trimmed.
- All pages use the expected scaling mode: actual size, fit, or fill.
- Gutters are wide enough for trimming and finishing tolerance.
- Page numbers and signatures collate correctly after folding or cutting.
For booklets, print one dummy copy on cheap stock, fold it, staple or clip it, and mark the physical page order. For n-up sheets, cut one sheet apart and confirm the pieces stack correctly. A two-minute dummy catches the kind of error that a beautiful screen preview can still hide: wrong flip direction, wrong stack order, or a fold that fights the paper grain.
Use PDF Press to Impose PDFs in the Browser
PDF Press is built for this exact DTP workflow: prepare a PDF document for the printing press without installing a desktop imposition suite. The practical workflow is:
- Open PDF Press and upload the source PDF. The file stays on your device.
- Choose the imposition tool: Booklet for saddle stitch or perfect binding, Grid for n-up layouts, Cards for card sheets, N-up Book for multi-page signatures, Monkey for cut-and-stack, or Gang Sheet for mixed jobs.
- Set output sheet size and confirm the trim size, scale mode, margins, gutters, and page direction.
- Add finishing marks with Cutter Marks, Registration Marks, Color Bar, or Slug tools.
- Preview every sheet before export. Check page order, marks, front/back orientation, and margins.
- Download the imposed PDF and send that file to print.
The important advantage is chaining. A real job is rarely just one operation. A booklet might need Booklet, then Cutter Marks, then Color Bar. A card sheet might need Grid, then Crop Marks, then Header/Footer slug data. PDF Press lets each operation feed the next, which is how prepress work happens in production.
Common Press-Ready PDF Imposition Mistakes
| Mistake | What Happens on Press | How to Fix It |
|---|---|---|
| Using reader spreads as source pages | Pages impose in pairs that cannot fold correctly | Export single pages in reading order, then impose |
| Missing bleed | White slivers appear after trimming | Add 3 mm / 0.125 inch bleed before imposition |
| Wrong TrimBox | Marks and page placement are offset | Fix page boxes or crop to the correct trim size |
| No creep compensation | Inner booklet pages lose outside margin after trim | Enable creep for thicker saddle-stitched jobs |
| Wrong duplex flip | Back side prints upside down | Proof one sheet and adjust turn/tumble or printer flip setting |
| Marks too close to trim | Marks remain on the finished piece or disappear before cutting | Use proper crop mark offset and larger output sheet margins |
| Sequential n-up used for a booklet | Folded booklet reads out of order | Use booklet or signature imposition instead of ordinary n-up |
Final Press Checklist
Before sending the imposed PDF to a print shop or running the job yourself, confirm this final checklist:
- The source PDF is single-page, not reader spreads, unless the printer specifically requested spreads.
- TrimBox, BleedBox, and page size are correct.
- Bleed extends beyond trim anywhere artwork reaches the edge.
- Fonts are embedded, images are high enough resolution, and colors match the print workflow.
- The selected imposition pattern matches the finishing method.
- Output sheet size leaves room for gripper, gutters, bleed, and marks.
- Booklet page count, signature size, and creep settings are correct.
- Crop marks, fold marks, registration marks, color bars, and slug lines are outside trim.
- Front/back orientation has been proofed on at least one physical sheet.
- The final file name includes job name, trim size, imposed sheet size, version, and date.
If those boxes are checked, the PDF is no longer just a document. It is a production file: imposed, marked, proofed, and ready for the printing press.
Probeer het op je bestand
Open het Grid-hulpmiddel
Opent met het hulpmiddel klaar — sleep je PDF erin en download.
Openen in PDF PressGratis · inloggen met Google · bestanden verlaten nooit je apparaat
PDF Press22 Professional Imposition Tools
Every tool runs locally in your browser — fast, private, and professional-grade.
Frequently Asked Questions
How do I impose PDFs for printing?
What does it mean to prepare PDF documents for the printing press?
What is the difference between reader spreads and printer spreads?
Is n-up printing the same as imposition?
Do I need Adobe Acrobat or InDesign to impose a PDF?
What printer marks should I add to an imposed PDF?
Can I impose PDFs online without uploading files?
How does imposition help reduce paper waste?
How does imposition reduce printing time?
How has imposition remained relevant despite changes in printing technologies?
What is sheetwise imposition and when is it used?
What role do prepress professionals and graphic designers play in imposition?
Who is typically responsible for handling imposition in the prepress stage?
How does cut and slack imposition handle uneven page numbers?
What is cut and slack imposition and why is it used?
What are the benefits of understanding imposition for those involved in printing and publishing?
What is work and tumble imposition and how does it differ from work and turn?
What is work and turn imposition and how does it work?
In what ways does imposition enhance print quality?
Related Articles
Probeer het op je bestand
Open het Grid-hulpmiddel
Opent met het hulpmiddel klaar — sleep je PDF erin en download.
Openen in PDF PressGratis · inloggen met Google · bestanden verlaten nooit je apparaat
PDF Press